Photo Explosion Boxes
February 5, 2009 at 2:47 pm | Posted in Accessories- Designer Series Papers, Events, New Products, Projects, Scrapbooking, Stampin' Up! | 4 CommentsLast week I got my order of new Stampin’ Up! supplies and in it was the new Rockabilly Specialty and Parisian Breeze Specialty Papers. They are beautiful!!!
I made some adorable photo boxes with them. I’ll be teaching how to make these boxes at my Photo Explosion Box Class on Saturday February 21st @ 2pm. Class members will choose whether they want to make the Rockabilly or Parisian Breeze box when the sign up. If you’d like to join us, please be sure to contact me by Weds Feb 11th, as I’ll need to order the supplies. (Class members will need to bring their own paper cutter with a scoring blade and their own adhesive. Thanks!) ETA: Class fee is $20 ($18 for current stamp club members.)
You’ll take your box home all ready to add your photos. Plus, you’ll take home the instructions and templates. Photo boxes make a great gift to keep on a desk or coffee table!
(Click on individual photos below to enlarge.)
Here’s the Parisian Breeze Specialty box. I wish you could reach right through the computer to feel this paper! It is textured, and much heavier than our normal designer papers- almost as thick as our card stock. It is very nice!


And this is the Rockabilly Specialty box. I love the glossy design on these papers! What I also love is that on each sheet in the pack, on one side is a very classic pattern: either stripes or polka dots, and on the other side is a trendy pattern like skulls and crossbones or cherries. I was initially going to go with just classic stripes and dots and my box. But then I decided that I’d be using photos taken at a favorite ice cream parlor, so I used some cherries. Too cute!
When you make your own box, you’ll get to choose which sides of the papers you want to use and where in the box they will go.


I’ll be adding photos to these boxes soon, and will post new pics then.
Galt Club Projects
January 27, 2009 at 5:57 pm | Posted in Accessories- Chipboard, Accessories- Designer Series Papers, Accessories- Punches, New Products, Scrapbooking, Specials, Stamp Set- Love You Much, Stamp Sets, Stampin' Up!, Technique- Pastels, Techniques- Glitter | 1 Comment
The ladies in my Galt Stamp Club asked for Valentines projects this month! I was happy to comply, and of course reached for my Love You Much Bundle as the base for each of the projects. (The bundle is 20% off only through Jan 31st- time is running out!)
I’m so excited about what I came up with! We had a great time Friday night stamping.

This is the card we made. Have I told you how much I love those two birds? They are just so sweet!

The glitter window along the bottom of the card is just adorable! When it is closed, you can see the Candy Lane Designer paper showing through from the inside of the card. Below, you can see the Dazzling Diamonds really shine!

I made the glitter window by first placing the Close to Cocoa card stock (punched with the Scallop Edge Punch) over the base of the Riding Hood Red card and securing with Dotto, a good temporary adhesive. Then I punched out the hearts using the new Heart to Heart Punch. I removed the Cocoa piece and stuck packing tape across the back where it couldn’t be seen. The sticky part of the tape is seen through the hearts in the front. Then I poured Dazzing Diamonds Glitter all over the piece and brushed off all the excess glitter. Finally, I added adhesive to the pack of the Cocoa card stock, lined it up with the hearts on the card base, and glued it down.
Here is what the card looks like open:


I colored the Chipboard Square with Close to Cocoa Craft Ink and a Sponge Dauber. Once it was dry, I used a 2-Way Glue Pen to add some glitter to the frame. It needed some glitz, too! The birds are softly colored in with Pastels.

I designed this 6×6 scrapbook page to be fast and easy to assemble since the other two projects are a little time-consuming. But I love the way it looks! The photo I chose wasn’t a good quality one. It was taken in low lighting and was pretty grainy. So I decided to go with a vintage look. I changed the overall photo to B&W first, then tinted it with a Chocolate Chip color. After I printed it, I used a Stampin’ Sponge and Chocolate Chip ink to color the edges, creating a feathered vignette-look.

I covered the stamped flower with a punched out one from the Trio Flower Punch and secured with a Silver Brad. I also used a VersaMarker to darken the inside of the letters. I did the same thing with the heart on the accent:


I got the idea for this sweet box from Stampin’ Up!’s website for demonstrators.

This part was made by stamping the same image three times using Chocolate Chip ink: once on each Close to Cocoa, Whisper White, and Riding Hood Red card stocks. I punched out the largest part with the Scallop Circle Punch, the middle with the 1-1/4″ Circle Punch, and cut out the heart with my Paper Snips. Then I colored in the dots with the Uni-ball White Gell Pen.

The hearts on the base of the box were made using both the Heart to Heart punch, and a Stampin’ Wheel! First, I punched the hearts out of a piece of plain paper. Then I used Dotto again to temporarily stick the template I made to the box (do this before you assemble the box!). I sponged on ink with Close to Cocoa. Then I inked up my Doodle Jumbo Wheel with Chocolate Chip and wheeled over the punched out template. Ta-Da! A super-cute design on my hearts!

Some Riding Hood Red Taffeta Ribbon and a stamped saying finishes the project!
Truffle Boxes
January 16, 2009 at 11:44 pm | Posted in Accessories- Designer Series Papers, Accessories- Markers, Accessories- Punches, Events, New Products, Projects, Specials, Stampin' Up! | 3 Comments
I’ve said it before. I love boxes! These super cute little things hold four handmade truffles. Yum!
I’m giving them away as raffle prizes tomorrow at my Mystery Hostess New
Catalog party. (If I can talk myself into letting them go. lol)
The basic box is very easy to make. For the bottom, start with a 5 7/8″ x 5 7/8″ piece of card stock. Score at 1 1/2″ on all sides with the Paper Cutter, using the Scoring Blade. Cut up to intersecting lines to form tabs. Fold up and secure with Sticky Strip.
To make the lid, start with a 4 1/2″ x 4 1/2″ piece of cardstock and do the same thing, except score all sides at 3/4″. Then cut tabs, fold up and glue.


For the valentine box, I used the Love You Much Bundle. The focal point is made using the Scallop Edge Punch & the Scallop Circle Punch. I cut a hole in the lid with the Coluzzle before folding up and gluing. Then I secured a transparency sheet inside the lid with Sticky Strip. I love being able to see the sweet treats inside!


My second box is actually a sneak peek item. 🙂 It features “Yummy”, a Sale-A-Bration set for this year! It will be available to get for FREE from Feb 1st through Mar 31st this year. (More about that later.) I love this set! It is perfect for people like me who like making homemade goodies and packaging them pretty!

 With this box, I wanted even more of the truffles to show through, so I made a completely transparent box lid. I cut a transparency sheet down to 4 1/4″ x 4 1/4″, then scored 3/4″ on all sides. This makes the lid smaller than the box so it fits inside of it, rather than over it. I didn’t want the clear box lid on the outside for two reasons. One, I don’t yet know about a really good, truely invisible adhesive. So I used Mini Glue Dots to glue the tabs down. They work great, but they are too noticeable for me. Two, I didn’t want the box lid to interfere with my design of the box sides:

I used my Stampin’ Markers a lot for the sides. (I used my Stamp-A-Ma-Jig a lot too, because I know I wouldn’t get these all straight otherwise!) The pretty swirly scrolls on the box sides are part of a large stamp that says “A little Something for you”. So I simply inked up the portion I wanted with a Basic Black marker and stamped onto my project. Then I inked just “Yummy” from the “a little Yummy for your tummy” stamp with a Real Red marker and- Voila! I love the way it turned out!
I really hope the people that win these boxes tomorrow like them!
Thank You Cards (from the Love You Much Bundle)
January 13, 2009 at 10:11 pm | Posted in Accessories- Chipboard, Accessories- Designer Series Papers, Accessories- Punches, Events, New Products, Projects, Stamp Set- Love You Much, Stampin' Up! | 1 CommentThese are the cards we’ll be making at my Mystery Hostess New Catalog party this Saturday. Aren’t they cute?

I’ve been loving my new products from the Love You Much bundle! I’ve made only valentines with it so far, so I was itching to make some cute cards for other occassions, too. My DH isn’t so sure about these. He thinks they look nice, but he is under the opinion that if it has a heart on it, it has to be a valentine. But he isn’t a girl. lol

This first one uses Pacific Point card stock (an In Color). I love the way it looks with the Close to Cocoa and Chocolate Chip! But then, brown is my favorite color. The sayings on both cards are from the stamp set Thank You Kindly.


This one is made with Kiwi Kiss (another In Color) and a chip board scalloped square from the On Board Essentials assortment. We’ll be coloring the chipboard with Craft Ink and will also “paper piece” those adorable birds.

Be sure to call or email me tomorrow if you know you’re coming on Saturday for your extra raffle ticket. Otherwise, just pop on by if you’re able to make it!
Mystery Hostess New Catalog Party
January 9, 2009 at 12:10 pm | Posted in Events, New Products, Stampin' Up! | 2 Comments Mark your calendar for Jan 17th!
This will be your first chance to get your hands on the brand new Stampin’ Up! Spring-Summer Idea Book & Catalog! New stamps, paper, punches, and more!
So be at my house by 2pm (there will be an on-time drawing!). I’ll have the annual catalog scavenger hunt and lots of goodies will be raffled! Lucky winners will get the Hostess Benefits from the sales at the event! Get an extra ticket by RSVPing by Weds Jan 14th, and get more tickets for each friend you bring to the party!
We’ll be using new stamps at the project table.
And, I’m making cream puffs. 😉
Love You Much Bundle
January 1, 2009 at 12:51 pm | Posted in New Products, Specials, Stampin' Up! | Leave a comment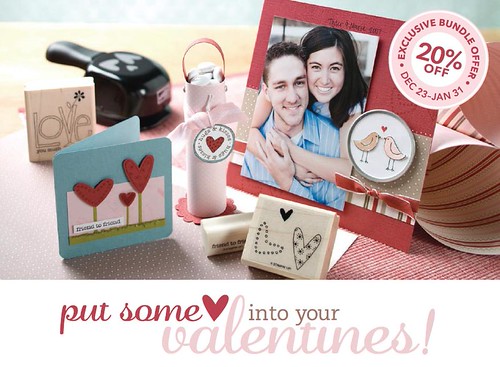
I LOVE! this new bundle Stampin’ Up! has come up with for Valentine’s Day! It includes coordinating stamps, designer paper and a large punch– all sneak peek items from the coming Spring-Summer catalog! When you order it in the bundle, you get these items 20% OFF! And you don’t have to wait until the new catalog comes out- you can have it now!
I love each of the items individually and know that I will get so much use out of them. But used together, I’ll be able to whip out super-cute projects so easily!
Love You Much Bundle available now through Jan 31st.


Click here to download the printable flyer.
Click here to view the bundle on the online store. (If you have problems ordering it online, contact me.)
Country Living Holiday Collection Stamping Kit
November 5, 2008 at 11:17 am | Posted in Accessories- Chipboard, Accessories- Designer Series Papers, New Products, Projects, Specials, Stamp Sets, Stampin' Up!, Technique- Home Decor | Leave a commentThat’s a mouthful. But check out this cool kit!

Invite the warmth and coziness of the holidays into your home with Stampin’ Up!’s® Country Living Holiday Collection Stampin’ Kit. This kit has everything you need to create beautiful handcrafted ornaments.
 The kit includes:
• Holiday Collection six-piece stamp set
• Die-cut chipboard/Designer Series paper
• Whisper White card stock
• Ribbon and cord
• Pretties Kit brads
• Dazzling Diamonds Stampin’ Glitter®
• Classic and Craft Stampin’ Spots®
• Adhesives
Click here to download a flyer detailing the kit contents.
Click here to order online! (Be sure to select me as your demonstrator to receive the $49.95 price.)
Here are additional projects you can make using only products from the kit! I will email the instructions for these projects to anyone who orders the kit.


Card Class Samples
September 1, 2008 at 8:52 am | Posted in Accessories- Designer Series Papers, Accessories- Markers, Accessories- Punches, Events, New Products, Projects, Stamp Sets, Stampin' Up!, Technique- Pastels, Wheel- Classic Stars Jumbo | Leave a commentI’ll be having a monthly card class every 1st Friday of the month. Each time, we’ll make three cards (with matching envelopes) for only $10! Call or email me by this Wednesday to save your spot for this week’s class.
Here are the cards we’ll be making this Friday:

Stamp Set: Tart & Tangy
Ink: Real Red & Old Olive Stampin’ Markers
Paper: Summer Picnic Designer Series Paper & Real Red, Old Olive & Whisper White Card Stocks, Medium Whisper White Envelope
Accessories: 1 1/4″, 1 3/8″ & Scallop Circle Punches, Scallop Edge Punch (new!), 5/8″ Real Red Grosgrain Ribbon, Linen Thread, Crafters Tool Kit (Paper Piercer & Mat)

Stamp Set: Say It with Scallops (the new Ronald McDonald House stamp set!) & Classic Stars Jumbo Wheel
Ink: Baja Breeze (new In Color!) Classic Ink Pad
Paper: Baja Breeze, Certainly Celery, Old Olive & Whisper White Card Stocks, Medium Whisper White Envelope
Accessories: 1 1/4″ Square Punch, Scallop Square Punch, Small Star Punch, 5/8″ Certainly Celery Grosgrain Ribbon, Silver Brad, Crafters Tool Kit (Paper Piercer & Mat)

Stamp Set: Sock Monkey (new!)
Ink: Chocolate Chip & Bashful Blue Classic Ink Pads
Paper: Bashful Blue, Pumpkin Pie, Brilliant Blue & Whisper White Card Stocks, Medium Whisper White Envelope
Accessories: Stampin’ Pastels, 1 3/8″ Circle Punch, Dimensionals, Paper Snips
Convention Displays
August 31, 2008 at 4:24 pm | Posted in Accessories- Big Shot, Accessories- Designer Series Papers, Convention 2008, Decor Elements, New Products, Projects, Stamp Sets, Stampin' Up!, Technique- Home Decor | Leave a commentAs promised, here are some of the displays that were around convention this year.

The first diplay I wanted to see was the Decor Elements one. Stampin’ Up! staff was there to teach us how to apply the vinyl decorations to walls. They even let everyone try it out. I was surprised at how easy it is to put the Decor Elements up.
And these are samples of Phase 2, the next set of vinyl artwork Stampin’ Up! is releasing. These will be available to purchase on Oct 1st. The boards they are displayed on are 7′-8′ feet tall. It was nice to see them IRL, because I hadn’t realized how big some of them actually were.


Next, I headed over to the Big Shot display.


Here are some of the samples of things you can make with the Big Shot.


The patches on these baby clothes were cut out with the Big Shot!


I love these next displays! Stampin’ Up! set up four “rooms” and throughout the week, Stampin’ Up! staff decorated them. I took these photos on the last day, when they were all completed. They are decorated with Decor Elements, Big Shot images, and of course, stamps!


Other displays:


Introducing our New Product Line… Decor Elements!
July 1, 2008 at 11:42 am | Posted in New Products, Stampin' Up! | 1 Comment
Stampin’ Up! is all about creativity- in all forms! We’ve been using stamps, chipboard, and other accessories to decorate our homes for a while now. With Decor Elements, we now have a new way to decorate easily and affordably- with images that match the stamp sets we love!
I can just see it! A framed piece of stamped art (like a name frame or a framed scrapbook page) on a table or dresser with coordinating images echoed on the wall behind it. Or stamped curtains beside a dresser with the matching larger images. We’ll be able to go a step farther with our creative home design.
The Decor Elements are vinyl art (they are basically huge vinyl rub-ons) and are great to use on walls, furniture, mirrors, glass, chipboard, cardstock & lots more! Plus, they are easy to remove when you’re ready for a new look.
And the best part is… they are available to order NOW!
Click on the above image to learn more about Decor Elements, download the product brochure & watch an intructional video on how to apply the vinyl images.
I love it! And this is just Phase 1! I’ll be learning about Phase 2 at the Stampin’ Up! Convention at the beginning of August. Can’t wait to see more!
(I’ll demonstrate how to apply Decor Elements at my Mystery Hostess New Catalog party on August 9th!)
Flickr Photos


Blog at WordPress.com.
Entries and comments feeds.
